First of all, let me say that this page is here for the sole purpose of helping others.
I have been helped many times when I just wasn't sure what to do. And many of those ideas were incorporated into my projects. I am always looking for quicker, cheaper and easier ways to produce better enclosures and racks. Building them has become almost as much of a habit as my reptiles.
The rack on this page is my latest. Based on many other ideas and past mistakes I had made. I DON'T claim to have invented anything on this page. Of course not. Oh my gosh, hundreds have built racks with so many variations and creative ideas. This rack is based on the idea that you don't have access to a table saw but you do have access to pre fab shelving. If you want to alter the design and idea to suite your need, go for it.
I would love to see what you came up with. But remember, ALWAYS help others to get started. That's what makes this so much fun.
DISCLAIMER!: Build this rack at your own risk. I don't warrant the ideas or the process. As for the wiring part, I have to suggest you get a licensed electrician to do that for you.
I do NOT give wiring advise because everyone wants to blame you for their mistakes these days. I am just showing what I did. Ok, enough of the fine, boring print...
Here we go...
(Click any photo to enlarge)
 |
Be sure to see my "Hatchling Rack" page as well. This is what we are going to build. Well...actually, I already did but I wanted to show you what I did. Remember, you can click on any photo so see a larger version. (Don't you just hate when someone shows you a tiny little photo with no link to a version you can see?) A new window will open with the larger photo so you will have to close it to continue. Ok, so I forgot to take photos of all the boards laying on the ground, but come on, you can imagine it can't you? |
||
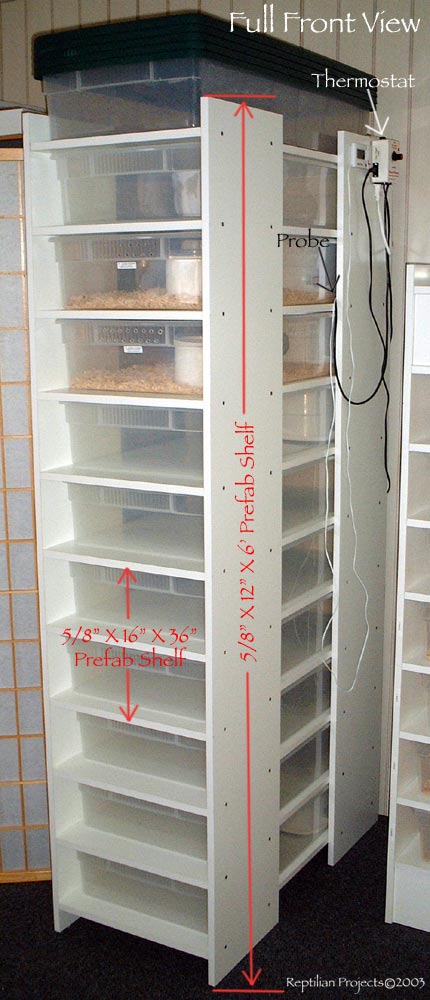
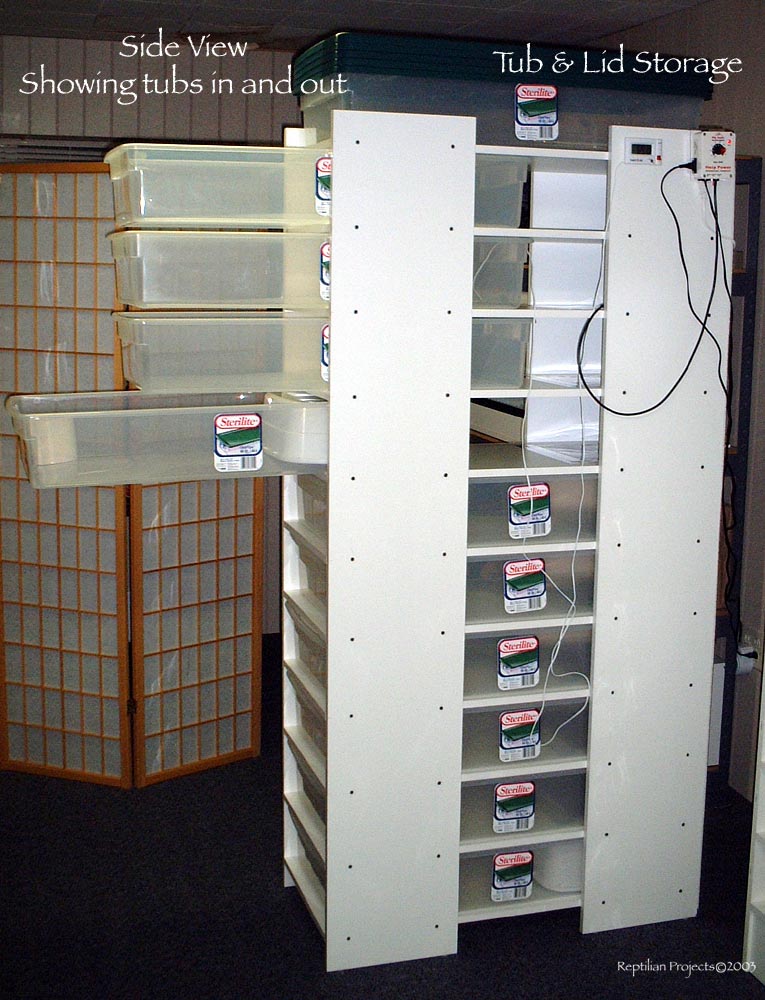
I used prefabricated shelving I bought from Menards. For those who don't have a Menards, it's like Home Depot or Lowe's. The shelving is only 5/8" thick and laminated on all sides. It's much lighter than the 3/4" melamine and nicer. But it's still heavy. Cost is almost the same when you consider the waist of cutting a full 4' X 8' sheet. You might save a few dollars but remember, this project requires NO table saw and all edges are finished. PLUS, the prefab shelving is more moisture proof I have found. Same rack but a view from the right side. Do you see why I call it a "Ladder Rack"? It looks like you could climb right up the side. (But Don't!) The tubs. Well, this is a source of great stress to us all, isn't it? I know, I know, the Iris CB70 is the best in this size. But I found this Sterilite tub at WalMart for 1/2 the price. It's the same size and everything. I don't know if it's built as well but I have no complaints so far. If you go running to WalMart, wait, don't look in the normal "tub" section of the store this time of year. Go back to the garden section and look through the Christmas stuff. That's where they are. I don't know what will happen after the holidays but they have them now. And the manager of one store told me they were a regular item. (We'll see). But either way, this design can be altered to fit other tubs. |
 |
|
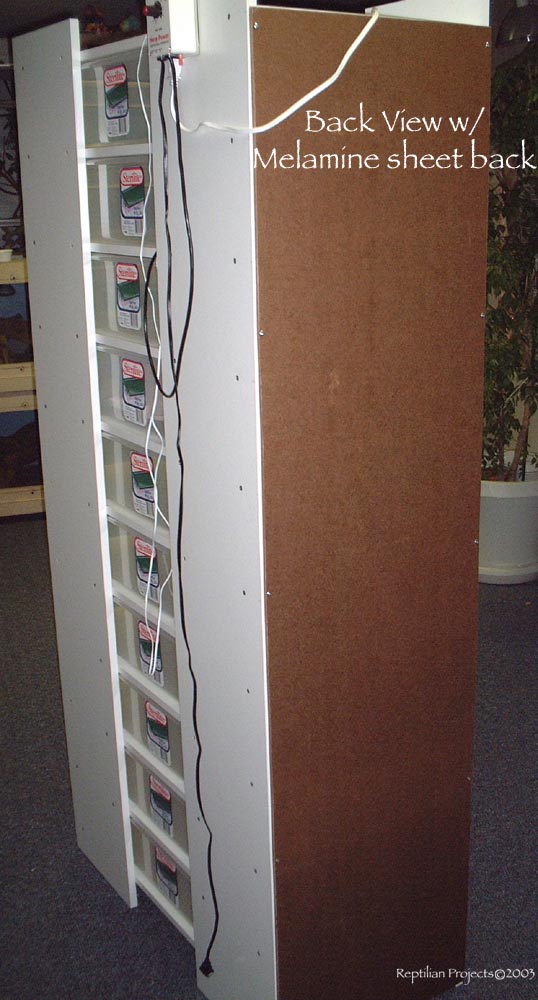 |
Here it is from the back. Not very pretty from this angle. |
Below is a list of supplies and totals: The prices and total may vary of course. I didn't include sales tax or shipping on Flex-Watt and Thermostat. Plus, some items are optional. The thermostat is almost half the cost alone, but I HIGHLY recommend you get one. And when you consider it holds 10 adults, your cost per unit is still very low. |
|
Here is a list of supplies: |
Totals: |
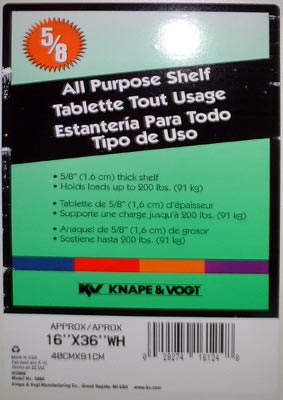 Prefab Shelf Lable |
I started at the bottom and worked my way up. This is important because it helps to keep the rack straight plus the distance between shelves is kept more consistent. I used a scrap piece of melamine bathroom sheet as a spacer between the tub and next shelf as I assembled. I started by making a mark 2 1/2" from the bottom of the 12" vertical board and attaching a horizontal shelf. The first level is the hardest because you have to attach all 4 vertical risers. BUT, once that is done, you are good to go. You will need a helper to do the first level. Now, lay a scrap piece of melamine sheeting on the first level shelf. Then put your Sterilite tub on that. Now, position your second shelf on top. Put two screws in each 12" riser. I put mine 2" from the left and right edge. The melamine sheeting gives you a spacer for heat expansion and irregular tubs. Now pull the tub out and remove the sheet spacer. Yea, it's hard to pull it out, I know. Don't panic! Now test your tub without the spacer, see how easy it slides in and out??? Continue this process all the way up to the last level. Now lets wire for heat. BUT WAIT!!!! Do we use "Back Heat" or "Bottom Heat"??????? Ok, Don't do what I did and waste valuable brain cells and unnecessary worry about this. Of course your application will vary but I am building this rack for snakes. (Specifically corns and ball pythons). Go with the belly heat and sleep at night knowing your adult females are happy. |
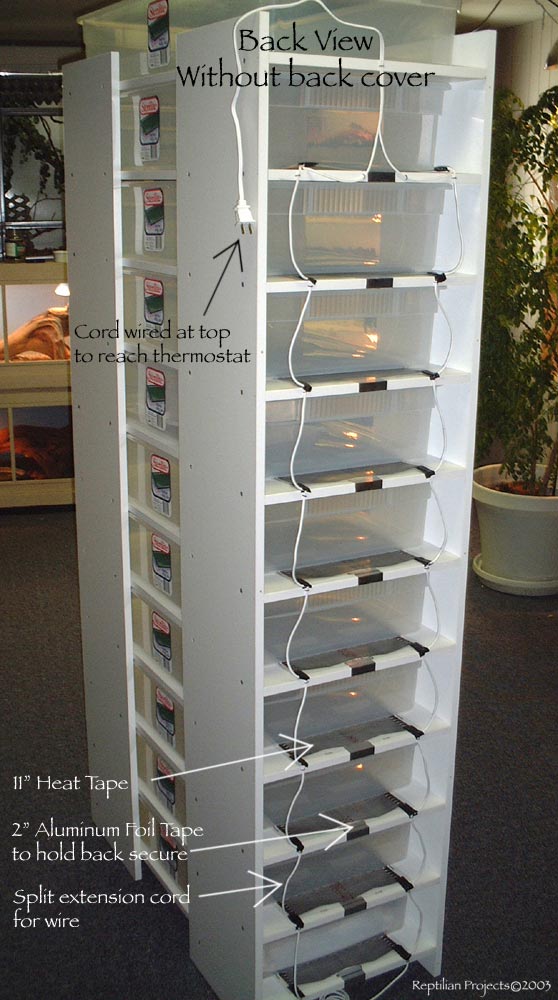 |
Here is a quick view of the finished, wired rack without the back melamine sheet in place. |
|
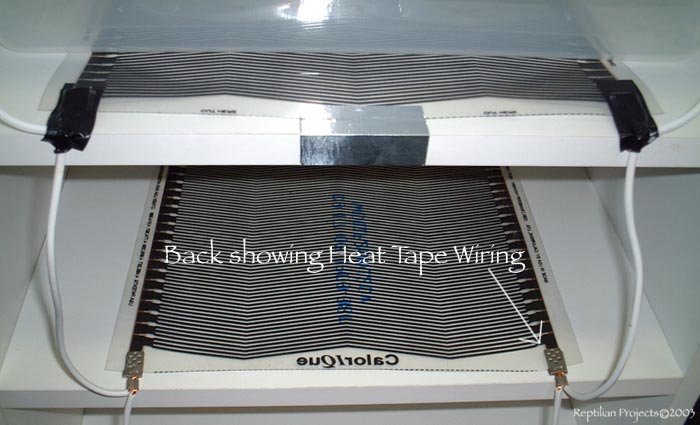
| This is the back view of just two of the levels. 11" heat tape is used here. You can use 3", 4" or 11". Or maybe other heat sources. The sky is the limit. But I used Flex-Watt from Bean Farm & Big Apple Herp. Why did I choose 11" over any other? Well, first of all, it was a nice square size for the rack. Plus I could point the end connections to the back. Remember, I am using a thermostat so the amount of heat is controlled. I wanted a nice large hot spot since I had 34" of tub for gradient. |
 |
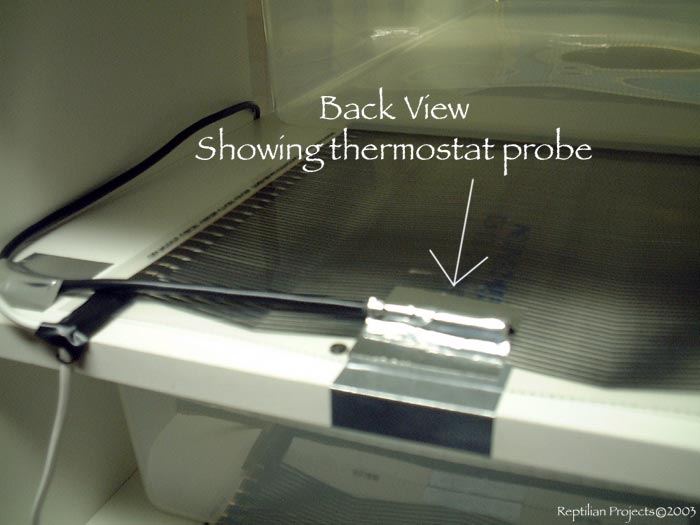 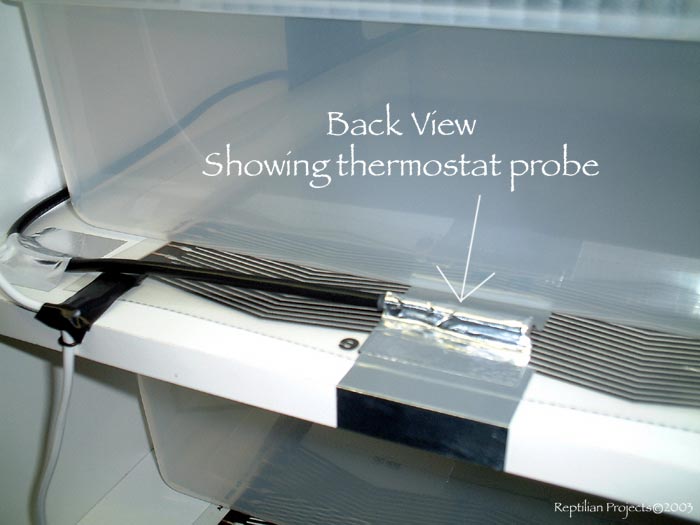 |
The same level with the Thermostat Probe taped down. You could put the probe inside the tub, BUT every time the occupant moves over it or when other changes are made, it affects the accuracy of the thermostat. Here, I have it taped to the surface of the heat tape at the back of the rack. | |
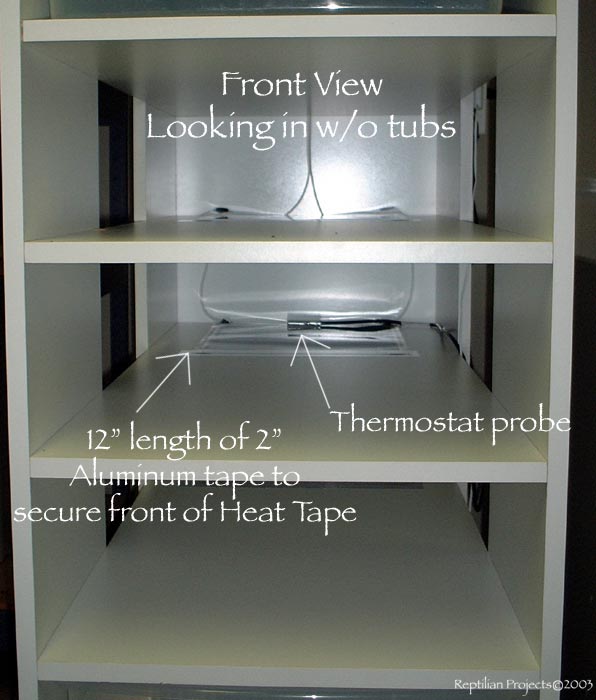
| Looking into the front of the rack, you can see the 11" heat tape You can also see the Thermostat Probe in the back. |
 |
|
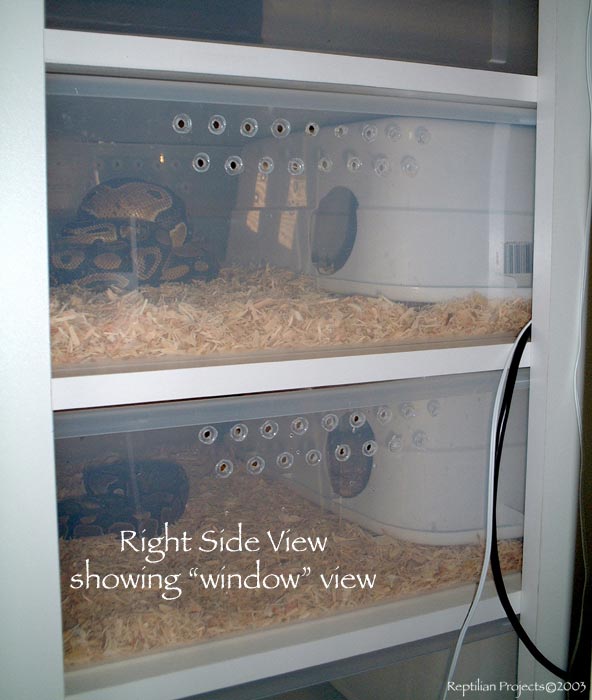 |
OK, so now we have the rack built and wired. They're moving in fast. May have to build another rack ASAP. Here you can see the coolest part of this rack. The "window view". That's right, your animal's new home has a "view". Well...actually, you have a view of them. On either the left or right side, you can peek in on the side to see into their hide. So cool. |
|
And from the front, it looks even better. Check out these accommodations. Did I mention I like WalMart? |
|
 |
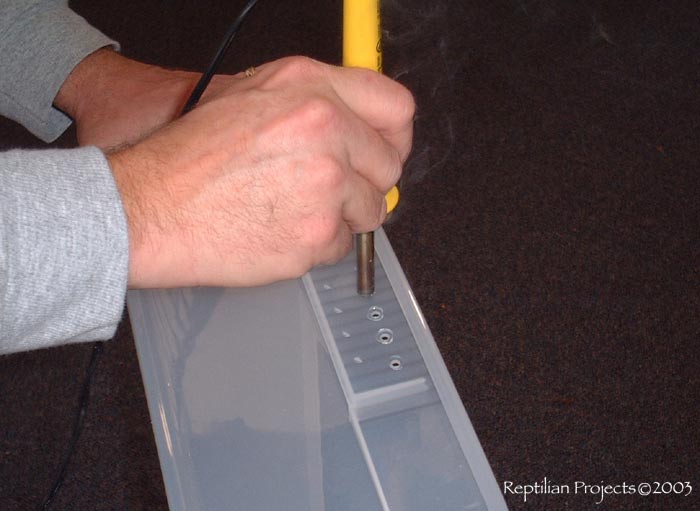
Ventilation Holes in tubs: I use to drill my holes with a 1/4" drill bit. Then I heard someone mention a couple years That's just plain brilliant. (This WAS NOT my idea. I don't know who to credit, sorry.) Here's what I do. I made a template out of a scrap piece of masonite or melamine sheeting. DON'T try to burn the holes all the way with the template in place. It will weld the template |
|
Now, you can go back and "push" in all of your holes where your marks are. Oh, I bought the soldering iron at, you guessed it, WalMart. $9.99 |
|
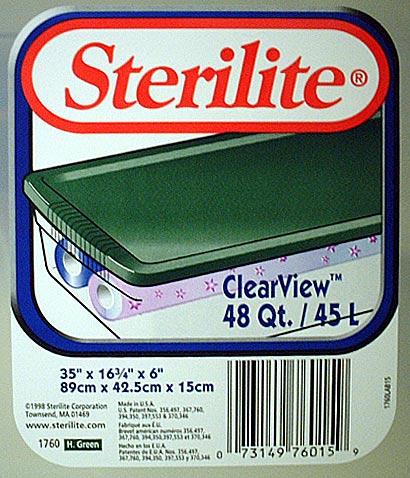 |
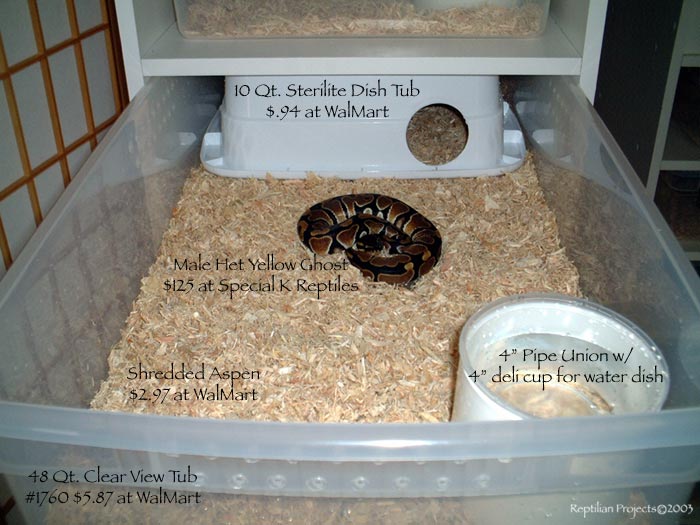
The tubs used in this project are the Sterilite ClearView 48Qt. Long, #1760 (no longer available). These worked perfect for the prefab shelving because they are only as wide as the shelves. If you go with another tub, make sure you check the width of the tub compared to the 16" wide shelving so it will fit. |
|
|
The hide is just a Sterilite Dish Tub from WalMart. I used a 2 1/2" circular drill to cut that hole. The tub is setting about 4" from the back so that some of it is on the hot spot and part of it isn't. But honestly, my pythons prefer to sleep behind the tub during the day. Sterilite 10 QT. Dish Tub #0649. $.94 at WalMart. |
|
Be sure to see my "Hatchling Rack" page as well.
All content within this website is the sole property of Reptilian Projects. All rights reserved. |